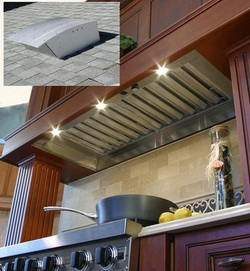
Kitchen Ventilation Fan
Although a kitchen ventilation fan is one of the common appliances present in every home, only a few people are aware of how important it is for it to function at full capacity. In essence, homeowners consider that the kitchen ventilation fan is merely there to eliminate the food odor. However, the truth is that exhaust ventilation also ensures that smoke caused by burned dishes would not settle and cause damage to the walls of the kitchen.
In addition, the steam resulted from cooking will not generate mold or mildew formations and the excessive moisture will not speed up the natural decay of vegetables or fruits stored there if the ventilation is optimized. Therefore, homeowners should learn how to care for their kitchen ventilation fan properly in a four-easy-step process. Note that the three components of the exhaust fan that need to be cleaned are:
- The cover
- The fan blades
- The filter
Step 1: Ensuring safety during the task
Like all electrical appliances, cleaning a kitchen ventilation fan should not be started without taking the proper precautions. Therefore, the primary action to take is disconnecting it from the electrical line. In case the fan is not plugged into a socket but integrated into the electrical system, it can be turned off from the fuse box. It is necessary to ensure that the proper circuit has been turned off in the eventuality that the fuses are not labeled.
Step 2: Detaching the cover of the kitchen ventilation fan
Before attempting to remove the cover, the person performing the fan cleaning and maintenance task should verify whether it is detachable or not. In general, the detachable covers are held in place with either screws or clasps. However, it is not uncommon for covers to be built in, so in such a situation it is unadvisable to try removing it as it will most likely break, even though it may simplify the task. On the other hand, the covers that can be detached should be left to soak in a mixture of water and ammonia and later on be scrubbed with a brush. For non-detachable covers, the cleaning can be performed using a sponge dipped in the aforementioned solution.
Step 3: Removing the kitchen ventilation fan
The fan can be safely removed from its socket since the power has been turned off beforehand. You need to clean blades that accumulate grease and dirt over time, causing additional stress to the motor and lower rotation speeds. The ammonia and water solution should be applied on a sponge and the washing should be performed with care not to get any water on the motor. Afterwards, the kitchen ventilation fan should be thoroughly dried.
Step 4: Soaking the filters
The filters of the kitchen ventilation fan are the components that accumulate the most part of the grease and dirt due to their nature. The best way to wash them is by soaking them for approximately fifteen minutes up to twenty minutes in a mixture of water and dishwater cleaner before proceeding to the rinsing and drying. All that is left to do at this point is reattach the components and turn it back on!

Categories
- Home
- Kitchen Ventilation Fan Information
- Kitchen Ventilation Fan Ranges And Styles
- Types Of Kitchen Ventilation Fan
- Kitchen Ventilation Fan Accessories
- Kitchen Ventilation Fan Costs
- Kitchen Ventilation Fan Information
- Kitchen Ventilation Fan Installation
- Kitchen Ventilation Fan Maintenance
- Kitchen Ventilation Fan Reviews
